

Today I’m going to show you how to exclude your internal traffic from the Google Analytics data. Especially if you have a really small website, it’s quite important to exclude your own visit in order to understand the “real” user behaviors.
This is a guide for non-tech people and that’s why we’ll use only plugins and platform (no coding skills are needed).
1. Install Duracell Tomi’s plugin and turn on the right Data Layer Variable
In this tutorial, I’m going to use a free plugin for WordPress called Duracell Tomi’s Google Tag Manager. You have to download and install it in your WordPress installation. Once you’ve done with that, you have to click on Settings > Google Tag Manager and than open the Basic data > Visitors page.
There you have to tick the option Logged in status, the plugin include the status of the users (logged-in or logged-out) to the Data Layer.

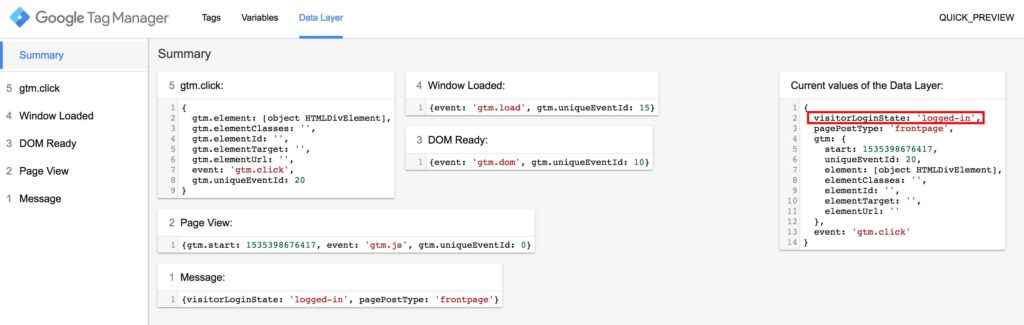
Now you have to open Google Tag Manager and turn on the preview mode. Than go to your website and you’ll see the preview console. There you have to click on Data Layer and you have to make sure that you see visitorLoginState in the Data Layer box.
2. Create the data layer variable in Google Tag Manager
If everything is working then you can move on and begin the implementation of your Google Analytics tag.
First of all, you have to create a variable that will store the information about the login state of the user. your Go back to Google Tag Manager and click on Variables > User-Defined Variable > New. There you have to create a new Data Layer Variable called visitorLoginState (make sure to use this name).

3. Create the trigger for logged users
Now you need the trigger that will block the Google Analytics pixel. Open the Triggers section and click on New. You have to create a Page View trigger that gets fired only for Some Page Views.
This trigger should be activated only when a user is logged in WordPress – that’s why when you define the condition you have to select the DLV – visitorLoginState variable (the data layer variable you created in the previous step) that contains the value logged-in.

4. Setup the Google Analytics tag
Open the Tags section and click on New. There you have to create a Pageview tag for Google Analytics – Universal Analytics (only if you don’t have a pageview tag already implemented!).
After that you have to define the Triggering – you have to select All Pages has a Firing Triggers and then click on Add Exception and select GAU – Logged In User (the custom trigger you created previously).

Now you can Publish the changes and go back to your website. If you keep the preview mode active you’ll see that the GAU – PageView won’t get fired if you are logged-in.
